Zoysia Lawn Guide
(Bermuda Lawn Guide is → HERE)
STOP – Read First
There are 2 ways to read this guide, below is the full text, and the new EASY READ subject by subject version is located → HERE. You can also adjust the font size and background color for easier reading by clicking the wheelchair icon.

This guide is 100% free, we leave it up all year, and we update it often. If you need to buy lawn care products we will either link to them here of you can visit our main website → HowToWithDoc
Zoysia Lawn Products → ARE HERE
Zoysia is a warm season grass that spreads and creeps much like Bermuda Grass. The care for Zoysia is much the same as well. This guide will walk you through all the steps and most common questions. DON’T make the number one mistake, not getting a soil test. Without a → SOIL TEST you will be guessing and possibly applying products that are not needed or may create more harm than good.
Bermuda vs. Zoysia
Zoysia is very similar to Bermuda with just a few exceptions. Bermuda tends to have BROWN stalks under the green blades, whereas Zoysia mostly has green blades. (It’s less “stalky”) This helps prevent the brown scalping lines. Both lawns like to be kept fairly short 1-2 inches and both lawns turn brown in the winter going dormant in most zones. Bermuda is slightly more aggressive than zoysia and if the two battle it out, the Bermuda will usually win.
Soil Testing

We like to use Clemson for our testing, but you can use whomever you like. The two critical factors from soil testing is Phosphorus level and PH. There is a page that covers ALL THE INFO about soil testing → SOIL TEST PAGE
On that page Doc goes over what is important and what to focus on. He also walks you through the testing process and how to ship them off. Doc also talks about not “reading too much” into your soil test. He mainly looks for wild spikes and PH levels.
Zoysia Lawn Products
Most Bermuda lawn care products can also be used on Zoysia lawns. Fertilizers, preemergents, soil improvement products and many weed killers can be used on both. Again, a soil test is critical if you want the best results. We have them listed → HERE.
Zoysia Lawn – Year at Glance
We will go into extensive detail below, but here is a summary.
End of winter – Preemergent (split) and Jump Start Program (see below)
Early spring – Water, Scalp, Fertilize
Spring – Water, Fertilize, Improve Soil, Keep cut height low, aerate, leveling, spot treat weeds, watch for bugs and fungus.
Summer – Water, feed lightly, watch for bugs and fungus, improve soil, leveling,
Early Fall – Feed, water, treat for grubs, watch for army worms.
Late Fall – Preemergent
DIY Lawn Treatments or Hire a Lawn Service?
The majority of “lawn chemical companies” do 3 things.
- Spray a 30-0-5 fertilizer a few times a year based on their route. (Not lawn’s needs.)
- Spray pre-emergent in the spring, and maybe in the fall.
- Add weed killers and apply to your lawn whether it needs it or not. (Most have ONE tank that treats all the lawns.) Often causing summer burns.
Basically… you’re a number on a route and if you have issues such as grubs, army worms, or fungus, they generally don’t treat for them. Our advice if you want a golf course quality lawn… Drop the lawn company… Period.
They also don’t take WEATHER into consideration when applying products. NOT SMART.
For about the same price of a “service” you can get TWICE the treatments and specifically design a program for your lawn’s needs.
Why do we stress HUMICHAR?
Every lawn and garden in the world will benefit from→ HUMICHAR. In simple terms… you are adding a pure form of carbon that will last forever and eventually you will REDUCE the need for so much fertilizer. I STRONGLY ENCOURAGE YOU to watch the videos we have produced and learn why the agriculture industry is now so focused on this product. CARBON… is the lifeblood of soil.
The Seasonal Stages of Zoysia Grass
Winter– Your lawn is sleeping and it is dormant. Grass is brown. Remember, while it is dormant, it is still alive. DON’T put down TOTAL KILL products like Round-Up.
Early Spring- Your Zoysia lawn is starting to wake up, slow growth. Green shoots start to show up and eventually a green haze shows.
Late spring– temps rise into the 80s and the growth starts to accelerate. We start to see “runners” and the Zoysia will spread and thicken.
Early summer– temps touch into the 90s and your grass is starting to SURGE in growth. Zoysia loves the 85-90 degree temps.
Mid summer – As long as it has water, Zoysia will grow and grow.
Fall – Zoysia growth starts to slow but remains green until frost temps hit.
Zoysia Doesn’t Like Shade
While not as shade sensitive as Bermuda, Zoysia likes a FULL day of sun, 6-8+ hours. Less than that and you will see weakened growth. Trees, fences, even vehicles parked will shade out the sun and weak growth will be seen. There are a few varieties that are more shade tolerant and you should speak with your SOD company for best results.
Types of Zoysia
Much like Bermuda grass, there are many varieties of Zoysia and they all have slightly different appearances and characteristics. There are three principal species of zoysia grass used for turf: Zoysia japonica, Zoysia matrella, and Zoysia tenuifolia. These species are differentiated by texture, cold tolerance and aggressiveness.
These are the “scientific” names and most sod producers and developers use a form of these but give it their own BRAND NAME.
They will vary in their color and the fineness of the blades. The CARE of these is the same other than the mowing height. The finer the blade, the lower the cut. Some varieties are ONLY available via sod, while others, mostly thicker blade grasses, can be established via seeding.
How Zoysia Grows
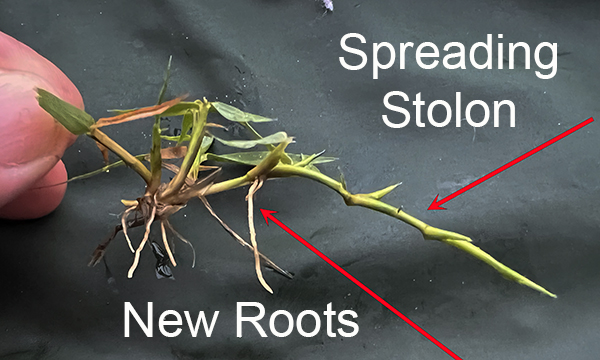
Roots – The roots of Zoysia grass can be VERY deep, once established. Some have been recorded as deep as 36 inches. Most established lawns have root systems that run 8 – 16” deep. They are very fine, string like roots.
Runners (rhizomes and stolons) – Here’s the phrase we use. Rhizomes must RISE UP in order to be stolen. Rhizomes are under the ground and stolons are above the ground. Both have NODES which are reproductive points that will grow roots and start a “new plant”.
Best Time for Seeding
Zoysia seeds will germinate when soil temps are above 65 degrees. This usually happens when daytime temps are in the 80s. So, late spring all the way through the main summer seeded lawns can be planted. We have several videos on seeding. Fall seeding should not be done as the roots will not have time to develop well prior to dormancy.
Best Time for New Sod
If you have the choice, the best time for new Zoysia sod is in the spring and early summer. This will give the best establishment and the ability to have a full growing season. However, many times the builder installs it and we can’t pick the time.
How to Seed Zoysia
It’s best to treat the lawn for weeds (no pre-emergent for 3-4 months prior) at least 3-4 weeks BEFORE seeding and make sure there has been good rain or watering since the treatment. Weed killers MUST be gone first. You must have rain to wash away weed killers.
If you are REPLACING a lawn of a different type of grass, you can use a TOTAL killer like Round-Up and kill off everything that is growing. This may take 2 applications, spaced a week apart, on tough lawns like Bermuda or St Augustine.
Heavily rake the area or rent a bladed DETHATCHER / SCARIFIER which will loosen up the soil and thatch. DOC BOUGHT THIS ONE.
If your soil quality is poor, bring in 1 – 2″ of quality topsoil.
Zoysia seed likes to be 1/8” to 1/2” deep.
Spread the seed with a HAND spreader at the rate shown on the bag or heavier.
Water 2-3 times a day lightly until the seed germinates, then once a day for the next 2 weeks. You want to make sure the soil stays moist through the early germination and growth.
Be GENTLE with the new lawn the first season. Use no weed killers for the first 2 months, then VERY sparingly the rest of the season. Deal with some weeds and just live with them. The following year we’ll deal with these including pre-emergent.
When to Lay New Sod
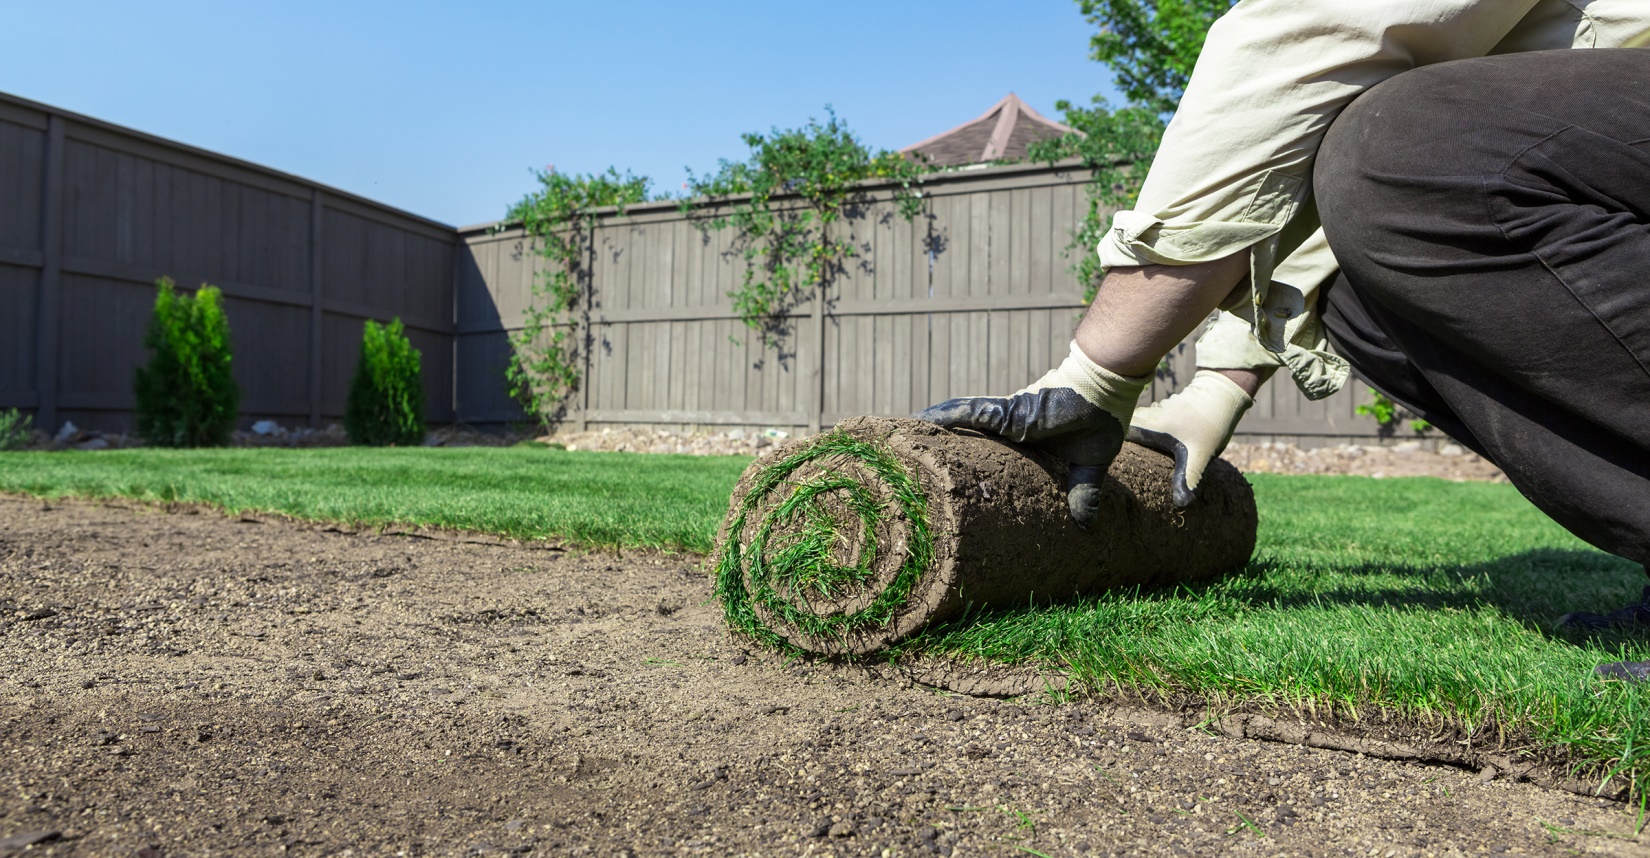
Tough to say due to construction needs, but it’s best to lay sod during the peak growing season if you have the choice. Early to late spring is my favorite time. Make sure you DON’T apply pre-emergents prior as it will limit new root growth.
A soil test is a good idea if you have the time and a light coat of a PGF 10-10-10 a few weeks before is not a bad idea.
Regardless of whether you’re tilling or not, make sure you apply the new HUMICHAR ®
MAKE SURE to follow the new sod water plan that most companies give you. Something like… water 3 times a day the first week. 2 times a day the second week. Once a day the third week. New sod must be kept slightly moist NOT WET. Just don’t let it dry out.
New Sod Care
Be GENTLE with it the first year and be PATIENT. People often do too much to new sod and it really should just be left alone the first year. Focus on maintaining a STRICT watering schedule and don’t let it totally dry out. Only use light PGF Complete and light Super Juice. Either spot treat weeds or live with them the first year. No pre-emergent for the first 8-12 months. Pre-emergent stops NEW cell production with whatever it contacts. Since it’s in the GROUND… it can slow the growth of new roots. (bad) Deal with some weeds the first year then attack them the second year with good pre-emergent program. People often want to do too much the first year but really just LEAVE IT ALONE and give it water, and a LITTLE food. The SECOND year is when you start the full program.
Zoysia Cutting Height
Zoysia likes to be short…PERIOD. Zoysia grass likes to stay between .5” and 2” for the majority of the growing season. Yes, MANY people let their Zoysia grow to 3-4 inches or even taller, but this is NOT the ideal length. The finer the blade or variety, the shorter the cut can be.
While long lengths might be good for drought conditions, it simply is not a good practice and will promote more issues such as fungus and bugs.
How often to Cut
Zoysia is generally know as a SLOW grower, but the more often the better is the answer. It’s better to take off 1/4″ to 1/2″ of grass rather than letting your grass grow for 2 weeks and cutting 50% off. We like to cut OFTEN and during the growing months we will cut ours every 2-3 days. Again, we are cutting ours at 3/4″.
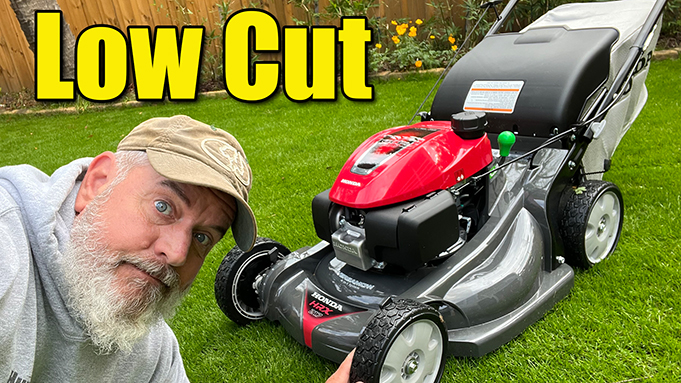
Best Lawn Mower for Zoysia
If you want to to keep your Zoysia very short, then a reel mower is the best choice. However, a GOOD quality rotary mower will also work. MAKE SURE you mower can down to 3/4″ cutting height which is VERY hard to find. You’ll need this LOW cut when scalping in the spring.
See the Rotary Mower Doc bought→ VIDEO HERE
Reel Mowers Work Best
Hands down… without a doubt… after much testing… we love the Mclane Reel Mowers. We have devoted several videos to them and done much testing. Rotary mowers are OK… but you will constantly deal with scalping issues since no one has a flat lawn. My suggestion is to go with the 25” unit as the wide width will help with uneven bumps and ruts. Make sure you order the one we link to as it has the front roller. (The bigger the better the finished cut.)
All putting greens and fairways are cut with reel mowers. So if you want a short beautiful lawn, look into a reel mower. However, if you do use a rotary or riding mower, make SURE you have scalp wheels and know how to adjust them. The more scalp wheels the better FYI.
Below, Zoysia lawn being cut with 25″ Mclane reel mower.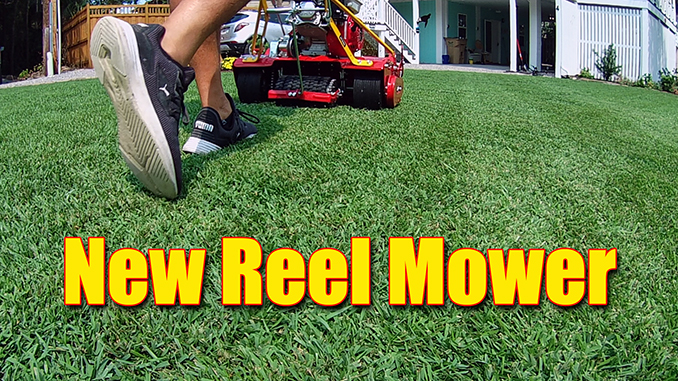
Should I Bag Clippings?
If you are cutting your lawn frequently then return your clippings. Very few lawns have EXCESS thatch build up and the thatch layer (dead grass on the ground) holds in moisture. Only dethatch your lawn if the thatch layer exceeds ½”. If you have to do a HARD CUT… like you went away on vacation… or grass is very wet… bagging or raking up the excess is a good idea. Otherwise return the clippings.
Piles of excess clippings after a short cut or cut of LONG GRASS should be raked up and removed. These PILES will kill off Bermuda below it and cause fungus issues.
Should I DETHACH Zoysia?
We almost never “dethatch” warm season, spreading type lawns. You will end up pulling up the runners and doing more harm then good. If you have thatch buildup use DirtBooster and the booster spray. Let it work naturally. Golf course and sports turf managers will often VERTICUT or Fraze cut. This is done when you want a very thin turf for sports play and ball roll. (i.e. Soccer Fields) The consumer grade dethatchers use PRONGS that will do more damage than good. As a LAST resort, after you determine you have a thatch problem, scalp the lawn, then detach with a BLADED dethatcher like the one shown below. (Click to see on Amazon)

Leveling you lawn…
If you’ll watch the video below AFTER you read this section you’ll understand. Leveling has many forms and SCALES. I try and cover all in the video. But read on….
Leveling your lawn can be a MASSIVE and expensive project depending on just how bad your lawn is and the size of it.
When leveling it’s best to use a LEVELING MIX which is 70% sand and 30% organic matter. But if you can’t find this CLEAN sand can be used.
REMEMBER… golf courses use PURE SAND on greens and fairways because they are built from HEAVY SAND BASED soils. (LAWNS ARE NOT) So using SAND is fine. However PLANTS… don’t grow well in pure sand and it can get VERY hot in direct sun. Therefore a MIX of soil and sand is best on lawns.
Leveling should be done during the growing season. Your hard work can be washed away if you do it during the dormant season.
It often takes several treatments to have a TRULY level lawn.
The lower the grass the better. The lawn should be SCALPED to the ground. Remember you are leveling the ground… not the grass and the grass will get in the way. Hiring a leveling service is great, but will be expensive if they do it right.
Best NPK Fertilizer Numbers
N = Nitrogen P= Phosphorus K= Potassium
We stress OVER and OVER that you need to get a soil test. Otherwise you are simply guessing. However, just about every extension office in the world and expert will tell you that WITHOUT a soil test, a balanced fertilizer with a 4-1-2 ratio should be applied. Yes, many will tell you not to add phosphorous unless it is deficient… BUT DO YOU KNOW THAT FACT? That is why we add a SMALL amount of “P”.
Remember that RATIOS are expandable. So a 16-4-8 like PGF Complete is actually a 4-1-2. (Just divide it by 4)
WHY PGF COMPLETE?
I can’t stress this enough… PGF Complete was specifically laboratory designed to our specs to be the PERFECT lawn fertilizer. 16-4-8 ratio of Nitrogen, phosphorus, potassium. 3% Iron, micro nutrients and Humic Acid. It has 3 forms of HIGH quality nitrogen. It has TINY particle size which is what ALL golf courses and pro turf managers use for better and more even coverage.
It uses NO bio products, waste product, sewage, or manures.
It is fairly mild. .58 pounds of nitrogen per 1000 sq ft is the standard application rate. (Most fertilizers are one pound) This means we can STACK IT, applying every 3-6 weeks during the PUSH times of our lawns.
Weed and Feed or Mixed Use Products
“Lawn products for dummies”… no offense but that’s the way you need to think of it. It’s one of the largest selling products for a reason. Most people just don’t understand professional lawn care. Avoid COMBO products at all times. Apply only what your lawn needs and use a QUALITY product. STAY AWAY from “mixed” products.
Organic Fertilizers (The good and bad)
Organic fertilizers are made from either WASTE products (poo) or grain products like soybean. We prefer the soy based organics like INNOVA
Don’t get me wrong… I love organics, but they have their limitations. The problem with organic fertilizers is that they are VERY, VERY mild and must be DIGESTED by microbes before they release the nutrients. Why is this BAD? If you have a weak lawn, bare spots on your lawn (dirt) or weak areas, the organics will not really feed that bare soil. A chemical fertilizer like PGF Complete WILL. So when new grass wants to move in there, it finds nutrition. They are fairly expensive for the amount of nutrients applied. If your lawn is weak use a fertilizer like PGF Complete.
They will not PUSH weak lawns to thicken up like PGF Complete will. Directly targeting exact nutrients is the BENEFIT of chemical fertilizers. Organics cannot do this.
The good… they are great for lawns that are thick and healthy during the summer months. They add carbon, amino acids, and cannot burn the lawn. If your lawn is healthy and the summer heat is coming… feel free to use the INNOVA
If your lawn is weak or you want it to thicken up, use a direct chemical fertilizer such as PGF. I now consider my organic treatments as SUPPLEMENTAL FEEDINGS that add organic matter and carbon.
Supplements like GreenShocker ™
“GreenShocker gives YOU total control of when your nutrients are released to your lawn.”
GreenShocker is a brand new product for 2022 and it takes time to understand how and when to use it. Basically, 99% of fertilizers are SLOW release fertilizers and you have no control of how they are released. GreenShocker is 100% fast release fertilizer that once watered in, reaches your lawn and roots in hours. Results can be seen in as little as 3 days. Because it’s mild, it can also be used in the summer and on cool season grasses. Watch the video below.
Soil Treatments
Below is the first EVER… production of HUMICHAR™ and it is a beautiful thing.
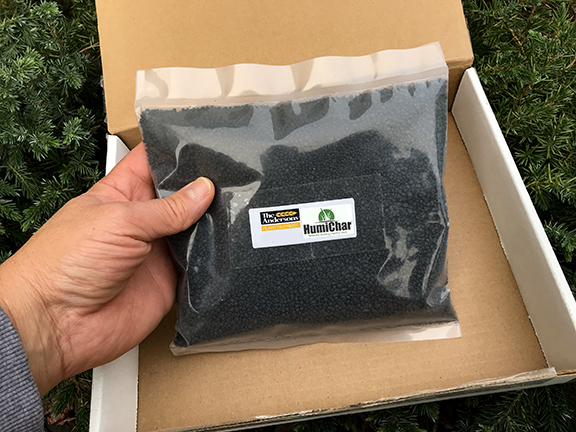
Improving your SOIL… is a critical part of a GREAT lawn. There are two main soil treatments on the market today. Humic Acid and BioChar. Both are good for lawns but are a mess to apply.
As soon as water touches these tiny pellets they disburse into 1000’s of tiny particles giving a wonderful even coverage without the hassle and mess. (My wife even thanked me) No more “black foot prints” in the house.
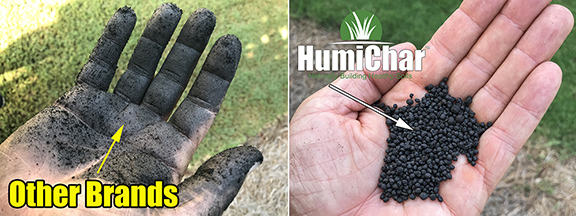
Critical…. Size does matter. Most other LAWN biochars remain on TOP of your soil and never work down into the ROOT zone.
HUMICHAR ™ can be used in ANY soil but is specifically designed for TOP APPLYING on lawns. Normal biochars can NOT enter the soil quickly due to their size and remain on TOP for months and even years. HUMICHAR ™ is ground EXTREMELY fine allowing quicker movement to the ROOT ZONE which is where biochar does most of it’s work. (SEE Size Does Matter PHOTO BELOW)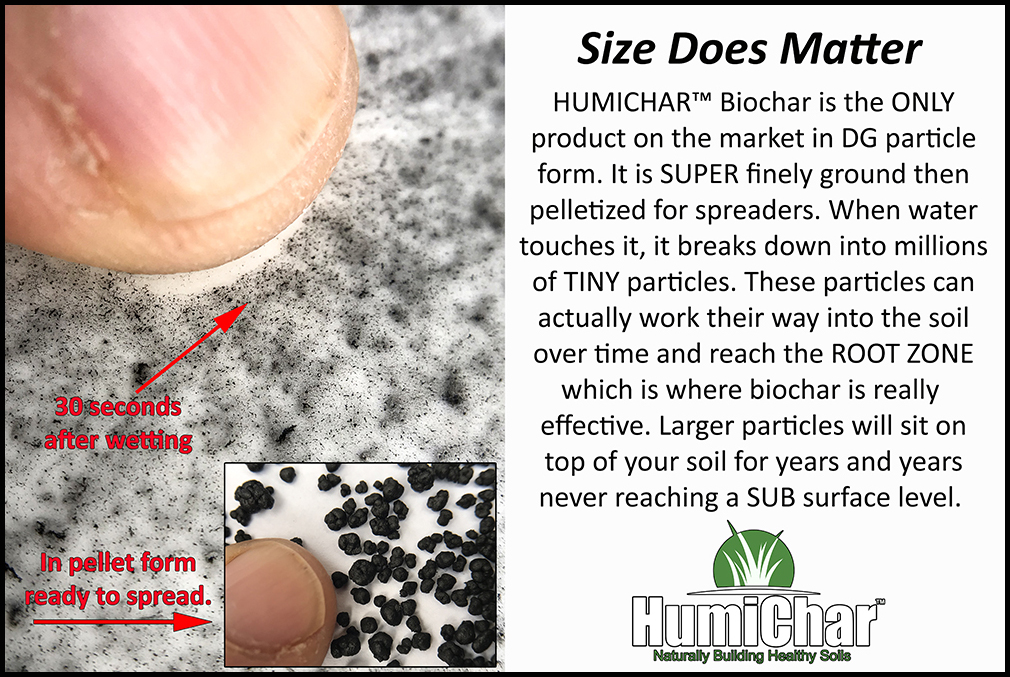
Both have their benefits so which do you choose? This problem has been solved with the 2020 release of HUMICHAR™ DG
HUMICHAR™ DG is a blend of both humic acid and biochar. This blend is then turned into DG particles. These particles instantly disintegrate into 1000s of sub-particles once water hits them.
HUMICHAR™ DG contains NO NUTRIENTS and can be put down at ANY TIME… and with ANY OTHER product. You cannot put down too much or too often. (We have done EXCESS testing with no negative results)
Lawn PH
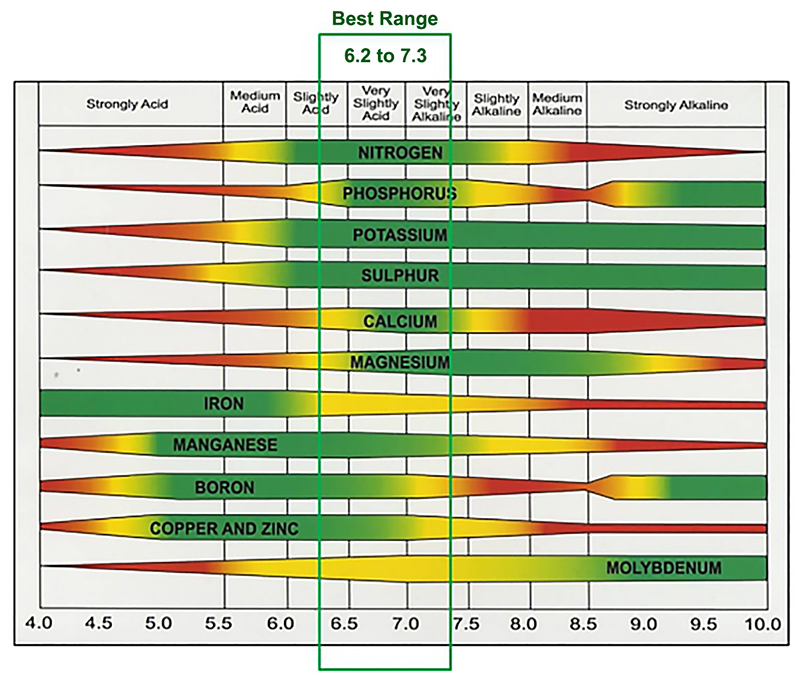
Zoysia grass likes to grow between 6 – 6.5 However it can tolerate slight variances well. You need to understand that it’s not really the GRASS that is impacted by the PH, it’s the usage of nutrients that get impacted.
Example: If your PH gets too high, your grass can’t access the iron in the soil. See the chart below keeping in mind that Zoysia likes about a 6.0 to 6.5
We prefer to do PH adjustments during the dormant season, but they can be done at any time. If your PH is low, add lime. See lime bag for application rates.
If it is high use a sulfur based product. Apply 5 lbs of pelletized sulfur per 1000 square feet of turf. Apply sulfur only when the air temperatures are below 75 °F. In 3 months, recheck the soil pH to see what change was made. It may take several years for a large pH change to occur.
Lawn Fungus, Dead Spots, Discoloration
Lawn Fungus – Prevention and Cure
Once temps start to reach the 80s in the spring I STRONGLY RECOMMEND you put out a treatment of the new PRO DG Fungicide launched this year. Unlike other granular products, the DG particles give you fantastic coverage. Unlike most sprays, it lasts longer. This is a PREVENTATIVE step.
The most common fungus? By far, dollar spot and brown patch are the top two fungi we deal with on Bermuda grass. Both can be cured with the P-DG
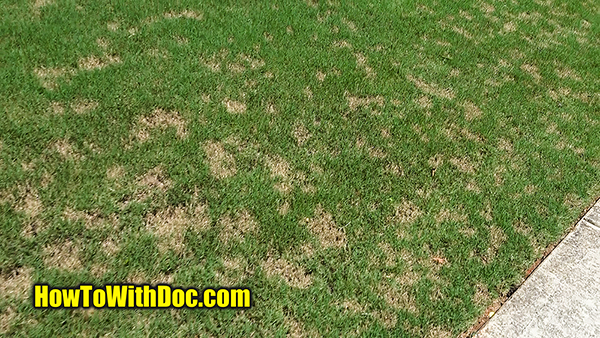
Dollar Spot Shown below.
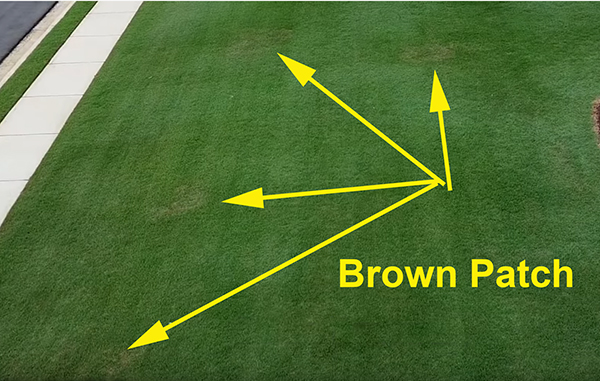
Brown patch below.
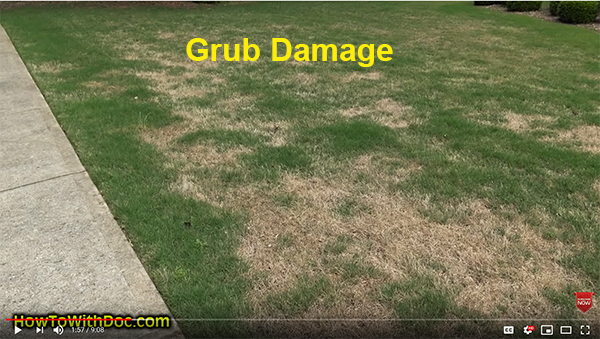
Grub damage – NOT a fungus below (see grub section)
To both prevent and cure the fungus apply the P-DG at the rate on the bag listed. You may treat up to 3 times. Then you must switch to a different chemical as the fungus will develop a resistance to the one product. After using the P-DG, switch over to the BIO-ADVANCED spray product we list.
Grubs and Grub Damage
Below is extensive grub damage on a lawn we diagnosed and treated. It can take weeks if not months for this to heal. This is why we recommend everyone do a once a year grub treatment.
Grubs do not feed at the surface. They stay in the ground and feed on roots. Three main signs you have grub damage. Brown dying patches that can be pulled up easy. (See video) Crows constantly on your lawn eating grubs. Armadillos or skunks digging up the ground and eating the grubs.
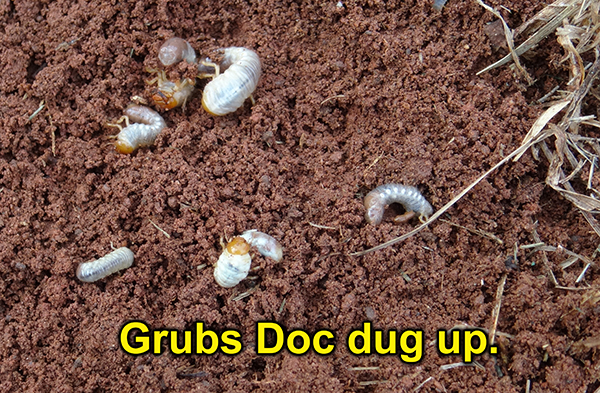
Dig up the sod / ground and fold it back. You will generally see grubs at 2-6” deep.
When to treat for grubs? Generally… in the spring and then late summer / early fall. That is when grubs look like grubs, white chubby worms, and be killed with the right product.
What to kill them with? Only one product we recommend, Dou-Kill product HERE
DO NOT use any other product as it may not kill the grubs. (Even if the bag says it does.) Apply at the HEAVY rate and then water, water, water, it into the ground. It must reach the grubs. Once the grubs are killed apply PGF Complete and the lawn should heal up in about 6 weeks.
Personally… I recommend people do at least one grub treatment a year in my area. We have seen so much damage from them it’s bound to show up.
Fall Army Worms
Thank goodness army worms don’t LOVE zoysia, they LOVE Bermuda. However, after seeing MANY army worm moths around the zoysia yard this year I decided to treat for them. I did find a few, but for the most part armyworms are not a major issue in Zoysia.
Aeration of Zoysia Grass
Most people that aerate their zoysia lawn do so in the late spring. Aeration should be done with a CORE PULLING aerator, not a spike unit. Many say leave the cores on the lawn, we don’t. We feel they cause more of a mess and cover up the grass from sun, more than they might return any nutritional value. Watch the video below to better understand.
Aeration should be done during the ACTIVE growing season. So anytime from spring to early summer is best.
Will Aeration Ruin My Pre-Emergent Treatments?
No… studies and most AG specialists agree that little to no impact on the effectiveness of the PE treatment after aeration. The % of ground being opened up is VERY small and the holes are very deep. We have also never had any issues.
Late Winter / Early Spring
Jump Start Program
The past few years we experimented with a new program that REALLY helped our grass establish quickly and spread. This is your goal FYI. Get it going fast, make it thick, and everything else is pretty easy.
The FOCUS point of this starter program is the WAKE UP period and allowing your Zoysia to wake up into an amazingly healthy environment. In other words… don’t try and play catch up. Get SOME of the nutrients it needs into the soil BEFORE it wakes up.
NOTE: We are NOT saying PUSH your lawn early with high levels of nitrogen. That is not a good idea. We simply want to ensure that all the needed nutrients and microbes are in the root zones as the plant comes out of dormancy. Remember… your soil has been sitting dormant too being washed and washed by all the winter rains and snows. This depletes nutrients, organic matter, and microbial activity zones.
Step #1
Get a soil test done early (winter). However, 90% of you WON’T do this step. So just move onto step #2. The soil test will tell you if your lawn is deficient in any nutrients and you can apply a fertilizer to correct. Often, the extension office will simply tell you to apply 10-10-10 anyways. This also tells you what your PH is like. Bermuda grass likes to be around a 6.0 ph.
Step #2
Around the time you put out your EARLY granular pre-emergent, also apply a treatment of HUMICHAR™ and a treatment of 10-10-10 PGF Balanced. (5 pounds of fert per 1000 sq feet) So if you have a 10,000 sq foot lawn… put down 50 lbs of 10-10-10. Then apply the HUMICHAR™ at the bag rate.
What will this do?
- The pre-emergent will stop weeds before they emerge.
- The HUMICHAR will improve your soil health, add carbon, and increase the CEC.
- The 10-10-10 will quickly release into the soil and fill it with nutrients without… a strong nitrogen push.
Again… this is done EARLY… when SOIL TEMPS are hitting about 50 degrees. For us in GA this is usually around late Feb / early March. Yes, your Zoysia grass will still be dormant.
Think of it like a programmable thermostat.
It’s winter, and it’s cold. You get out of bed, run to the thermostat, turn on the heat, jump back into bed, and wait for the room to get warm.
Now imagine having a programmable thermostat that turned the heat on 30 min before you woke up. You get out of bed into a comfortable environment.
Step #3
Kill any existing weeds. NOW…. Is the time to kill off any weeds that are growing. Weed killer is a NEGATIVE and best applied while your grass is still asleep. Use a zoysia safe weed killer spray on the website. Do NOT use something like Round Up grass and weed killer. It’s a MYTH that this is safe to use during dormancy as most lawns are never 100% dormant. You will KILL the grass that is awake.
***Do not now the grass after this treatment until you have had a rain, or have irrigated the lawn.
Pre-emergent Late Winter / Early Spring
This is a CRITICAL step in your lawn program…. Get it right.
“Pre-Emergent is God’s gift to lawn owners.” Doc
Pre-emergents (PEs) don’t really stop seed germination. The slow / stop the formation of new cell growth with what they contact. Since they are in the soil… they CONTACT newly sprouted seeds and the roots. Stop the growth of roots and the new seedlings die off. That’s a simplified explanation but will put your mind in the right frame as to how they work. Hence… we don’t apply them to new sod. New sod has roots near the surface of the soil and the PE can come in contact with the roots limiting root growth.
Why are they critical?
With the exclusion of a few sprouts of nutsedge, which PEs don’t work on, in 2019 & 2020 I had ZERO… and I repeat… ZERO weed killers to my yard. That is a true statement. Therefore my lawn suffered no NEGATIVE sprays or treatments. This is due to the proper use of PEs.
I can’t stress enough just how important this step is in your lawn program.
Putting down PEs the way we show is a critical step in having a beautiful lawn. This includes…
Proper Application
Split the timing
Be a little early
Watch out for Poa Annua regrowth after scalping.
How to Properly Put Down Pre-Emergents
Every area / zone has a “target date” for the application of PEs. Generally this is when soil temps hit a constant level of about 51 – 53 degrees. In my area everyone says March 15th. This is when weed SEEDS such as crabgrass START to germinate.
OK… so March 15th is my target date and we know that PEs last 6 – 12 weeks. So… why not put down your first application a little before that date… just to be safe… and then another application just after that date? One being a long lasting granular and the second being a liquid that also has POST emergent killing properties on crab grass. Just in case we missed some.
I recently explained this method to a 40 year agronomist and his comment was… “That is elegant; I wish I had thought of that.”
It’s also important to understand that when we SCALP our lawns, we often stir up surface seeds for things such as poa annua. This SURFACE SEED bloom is taken care by our second spray treatment.
Both of the PEs are listed on the website and watch for the videos coming out soon.
Fall PE Treatment
I prefer to hold off on my fall PE treatments as long as possible. Many say to put them down in September, but I hold off until the first COLD weather moves in which is usually around Nov 15th. The only thing this treatment does is prevent winter weeds such as poa annua. It will NOT prevent spring weeds. To me, this treatment is NOT a big deal unless you had LOTS of winter weeds the year before. Use the granular shown on the website.
Spring Scalping Zoysia Lawns
 The spring scalp of zoysia lawns is a critical step if you want a GREAT looking lawn. Why do we need to scalp? Coming into spring all the TALL Zoysia above the soil will be brown and dead. Let’s say you let it grow to 2.5” in the fall. So now you have 2.5” of brown grass. If you want to have a solid GREEN lawn that is 1” tall… who is going to see it? … NOBODY.
The dead brown zoysia grass needs to cut very low, hence the term SCALPING.
You should scalp your zoysia lawn to roughly 50% of the height you want your lawn to be during the normal growing season. So, if you want your green zoysia lawn to be 1.5” you should scalp your dead lawn down to ¾” Make sense?
LEAVING YOUR BROWN GRASS HIGHER WILL GIVE YOU AN UGLY YARD….. YOU NEED TO TAKE IT LOWER THAN THE GREEN IN THE SPRING.
When to scalp?
Normally I scalp my lawn when I start to see a TOTAL “green haze” all over my lawn and daily temps are constantly reaching the 70s. (Late March – early April here in GA) I do dread the scalp as it is a huge task because the massive amount of dead clippings need to be bagged and removed. (Watch the scalp video)
We do I pay a crew?
Scalping is HARD on equipment. In fact, one lawn service told me they wouldn’t come back and do it next year because it was simply too hard on their equipment. I had no issues with that. I agree. One thing you can do is scalp little by little over a period of 4-6 weeks rather than do it all in one day which is a bit over whelming.
Watering Your Zoysia Lawn
The “general” rule of thumb is that zoysia turf likes one inch of water per week. The second rule is that it’s better to water deep and heavy rather than lots of short waterings. This is true under normal growing conditions. However, if you have a drought move in… i.e. no rain for 3 weeks and temps in the 90s, you may have to use my short cycle program. Video below
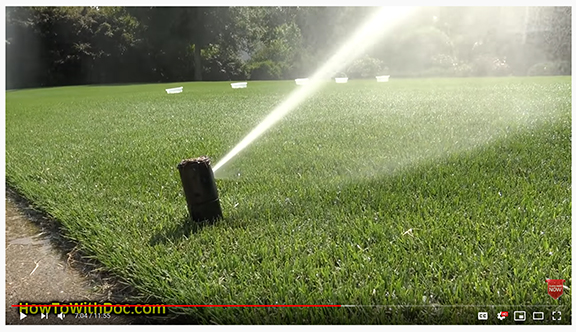
The problem with trying to follow the DEEP watering rule is that you, like me, probably have areas that dry out very quickly. These are known as HOTSPOTS. These hotspots come from underground formations and conditions such as construction debris, tree roots, septic drain areas, sand zones, etc.
The only way to keep these areas from browning out is to apply light waterings every morning and late afternoon. I run my zones for about 6-9 minutes per zone per watering during these extreme drought conditions. For the most part… this light watering will keep all my lawn green. Play with it and just keep an eye on your water usage. Droughts can be expensive.
Killing Weeds
PRODUCT NOTE: Please visit the → WEED KILLING SECTION of the website to look at the best current products.
VIDEO NOTE: There are TONS of weed killing videos and pages on the website.
There are 4 basic groups of weeds in “MY WORLD”.
- Broadleaf weeds (easy kill)
- Grassy weeds (easy kill)
- Crabgrass (med kill)
- Nutsedge (med kill)
- Dallis Grass / Goosegrass (VERY HARD KILL)
Most of the above can be and should be controlled with GOOD and HEAVY pre-emergent treatments. Often dallisgrass and goosegrass, very tough to kill, will germinate later and therefore our split PE application really helps. Dallis grass and goosegrass are the hardest to kill and often I spot treat with a tiny cloth and RoundUp type killer, applying ONLY to the plant itself. Labor intensive I know but saves the Bermuda.
I really don’t have to kill weeds on my lawn anymore. This is because I STRICTLY follow a good pre-emergent program. Yes… I said zero weeds. The only thing I have is a little touch of nutsedge now and then since PEs don’t control them.
Couple of “rules”…
In the winter watch the forecast and wait for a WARM spell of weather. Weed killers do not work well in freezing temps. Wait for a few days of temps rising up and treat. Watch video below
In the summer heat or during drought conditions, use caution and read labels. Often weed killers will temporarily yellow out or brown our Bermuda grass.
Make sure you understand which products kill via leave surface coverage vs. those that kill via being watered in and killing via the roots.
Your Soil Sucks… Adding Organic Matter
Soil microbes are GOOD… mycorrhizal fungi in soils are GREAT for lawns. Both play critical roles in the health of your lawn. However, both need quality ORGANIC matter to survive. This is why we created DIRT BOOSTER.

DirtBooster can be applied to your lawn in a spreader, then spray it with the microbe and fungus booster pack which is included. Do this when temps are warmer, above 80 degrees, and do this as often as you want.
The video below explains the benefits
Dog Pee Lawn Spots
You will hear mixed advice, much of which is not true. Dog pee burns lawns because it is high in nitrogen. PERIOD. It has nothing to do with PH. Just like dumping a pile of fertilizer will burn the lawn, dog pee does the same thing. There are 3 things you can do.
1- Train your dogs to pee in areas other than your lawn.
2- Immediately after they pee, flush the area with tons of water.
3- Treat the burned spots with Lawn Pee Spot treatment.
With spreading grasses like Bermuda and Zoysia, the grass will grow back into the spots in a few weeks. The Lawn Pee Spot will act as a cover up while this happens.

As an Amazon Associate we earn from qualifying purchases.